WordPress Plugins allow users to easily modify,
customize, and enhance any WordPress website. Instead of changing the
core software WordPress is built on you can rather create a plugin to
extend it. Using plugins allows you to have the most optimized WordPress
installation all while maximizing how you use the software to begin
with.
This article will walk you through the steps in creating a WordPress plugin.
What is a WordPress Plugin?
Here is the basic definition found on the
WordPress Codex.
WordPress Plugin: A WordPress Plugin is
a program, or a set of one or more functions, written in the PHP
scripting language, that adds a specific set of features or services to
the WordPress weblog, which can be seamlessly integrated with the weblog
using access points and methods provided by the WordPress Plugin Application Program Interface (API).
Creating a Plugin
When creating a WordPress plugin there are some standards to uphold
to when doing so. Below I’ll outline some key points to remember when
creating your own.
Plugin Name
If you’re planning on making a plugin that doesn’t exist yet you will
need to first determine its name. To be extra sure you will want to do a
search in the WordPress Plugin repository. Some developers choose a
name that describes more of what the plugin does so the end user can
establish a quick connection with the name. The name itself can be
multiple words.
Plugin Files
Typically a plugin lives within its own folder under
wp-content/plugins/
inside your WordPress installation. There is usually at least one PHP
file that is typically named after the plugin. So if your plugin was
named
amazing-plug then your PHP file name would most likely be
amazing-plug.php. Using a unique name is crucial so no two plugins use the same name.
You can also choose to split your plugin into multiple files; similar
to the way WordPress is built. Assets such as images, CSS, and
JavaScript are common to see within installed plugins.
Readme File
Readme files are useful for other developers and users. Usually these
files give a quick description of the plugin as well as sometimes offer
change logs which indicate previous updates and maintenance
announcements to users.
Home Page
If you plan to share you plugin with the WordPress community, having a
dedicated home page would be wise. This page can be used as a place to
download the plugin, report bugs, and announce updates to your user
community.
Standard Plugin File
A plugin must contain a bit of meta information which tells WordPress
what it is and how to handle it within your website. Plugins can be
installed, deleted, activated, and inactivated. A standard header is
introduced below to establish your plugin’s presence. The parameters
shown will tell WordPress how to optimize it within your website and
WordPress admin area.
The minimum WordPress needs to establish your file as a plugin is the line
Plugin Name: My Plugin Name |
The rest of the information will be displayed within the Admin area under the
Plugins section.
Programming the Plugin
Now the time comes to create our own demo plugin. I’ll be working on a
local copy of WordPress using the our Divi 2.0 theme. You can follow
along whichever method you prefer but to limit any downtime on your
website I suggest you work locally or on a testing server. Our blog
features other posts about installing WordPress locally if you are new
to the concept. Find the links below depending on your platform.
Links:
For this tutorial I will be creating a plugin that creates a custom
post type for our blog as well as establishes some other custom
parameters. This plugin will be useful because we will be able to use it
among any theme rather than just modifying one.
Plugin Scope
Our plugin will start with a simple PHP file. We will call this file
custom-music-reviews.php.
Within our file we will create a custom post type as well as define
some new categories within that post type. The purpose of this plugin
will be to write music reviews within specific genres without needing to
touch code in the future. Each review will have a feature image,
excerpt, rating, and genre type.
Starting Off
Assuming you have a local copy of WordPress ready to use, navigate to your
wp-content folder inside of a code editor of your choice. Inside that folder you should see a folder called
plugins. Inside of that folder create a new folder called
custom-music-reviews.
With the folder created create a new file inside it called
custom-music-reviews.php.
The path to the file should now be
wp-content/plugins/custom-music-reviews/custom-music-reviews.php.
With your new file created we need to add some parameters in comment
form like I explained earlier. For our plugin our parameters will look
like this:
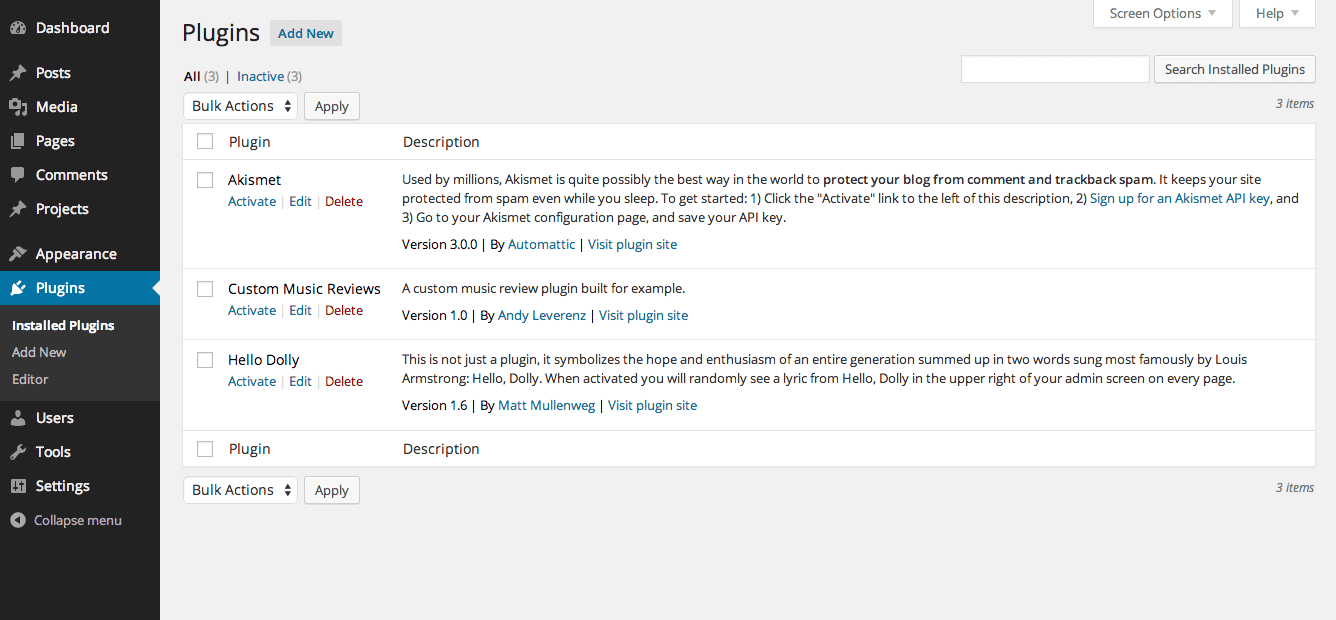
With this information added, save your file and navigate to your WordPress admin area. Click on
Plugins on the left side navigation and you should now see our plugin available. Wasn’t that easy?

With our parameters in place our plugin becomes available to activate under “Installed Plugins”.
Even though our file is empty we can go ahead and activate the
plugin. Go ahead and do that now. You’ll hopefully notice nothing
different about your site with the plugin activate. If you do you
probably typed the content above wrong or failed to close the comment.
Adding Our Plugin Code
With our file all set up and plugin active we can now add the inner
workings of the plugin which we will be using for this tutorial.
Add the code below:
function register_cpt_music_review() { |
'name' => _x( 'Music Reviews', 'music_review' ), |
'singular_name' => _x( 'Music Review', 'music_review' ), |
'add_new' => _x( 'Add New', 'music_review' ), |
'add_new_item' => _x( 'Add New Music Review', 'music_review' ), |
'edit_item' => _x( 'Edit Music Review', 'music_review' ), |
'new_item' => _x( 'New Music Review', 'music_review' ), |
'view_item' => _x( 'View Music Review', 'music_review' ), |
'search_items' => _x( 'Search Music Reviews', 'music_review' ), |
'not_found' => _x( 'No music reviews found', 'music_review' ), |
'not_found_in_trash' => _x( 'No music reviews found in Trash', 'music_review' ), |
'parent_item_colon' => _x( 'Parent Music Review:', 'music_review' ), |
'menu_name' => _x( 'Music Reviews', 'music_review' ), |
'description' => 'Music reviews filterable by genre', |
'supports' => array( 'title', 'editor', 'author', 'thumbnail', 'trackbacks', 'custom-fields', 'comments', 'revisions', 'page-attributes' ), |
'taxonomies' => array( 'genres' ), |
'menu_icon' => 'dashicons-format-audio', |
'show_in_nav_menus' => true, |
'publicly_queryable' => true, |
'exclude_from_search' => false, |
'capability_type' => 'post' |
register_post_type( 'music_review', $args ); |
add_action( 'init', 'register_cpt_music_review' ); |
This code above may look like a lot and almost seem like an unknown
language to you if you’re new to WordPress but if not you’ll recognize
this code as a
Custom Post Type. In this case our custom post type is called
music_review.
The code is essentially telling WordPress to establish a new type of
post within your theme. The post type has parameters that go along with
it such as labels, arguments, and more. I won’t go into a ton of detail
on how Custom Post Types work because I’ve already covered it within
another article on Elegant Themes. Be sure to read it to gain a full understanding.
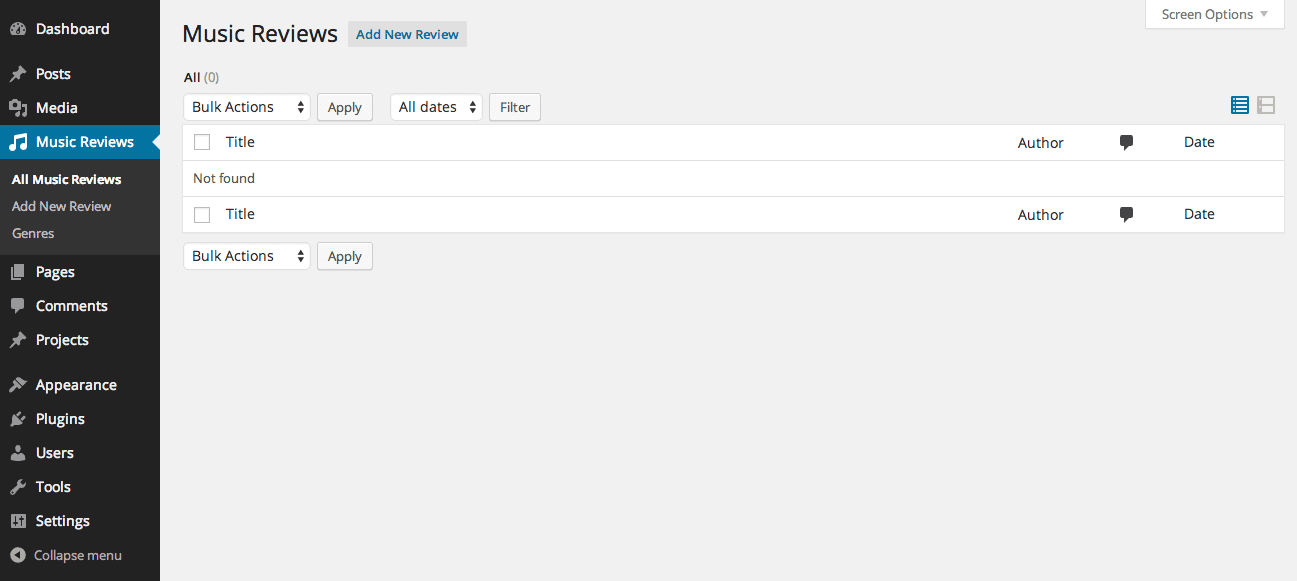
With our post type set up you can already see it active within the WordPress admin area.
Our custom post type is successfully implemented.
Lets take things one set further and include a custom Taxonomy called
Genre
inside our plugin. Think of a Taxonomy as a type of categorizing
feature that is completely custom. WordPress already includes Categories
and Tag support by default but developers can create custom taxonomies
to extend their themes or plugins even further.
Read more about WordPress Taxonomies
here.
Add the code below under the custom post type function we just added.
function genres_taxonomy() { |
add_action( 'init', 'genres_taxonomy'); |
Registering a new Taxonomy is relatively easy. We have made the connection to our custom post type by using the
register_taxonomy() function which creates a new taxonomy called
genres and assigns it to our post type
music_review.
We need to add one more line to our custom post type to make everything sync up. Add this code just below the
supports argument within the custom post type.
Here’s all our plugin code up until this point. For better legibility
I’ve stripped our code of any comments we had prior to this.
function register_cpt_music_review() { |
'name' => _x( 'Music Reviews', 'music_review' ), |
'singular_name' => _x( 'Music Review', 'music_review' ), |
'add_new' => _x( 'Add New', 'music_review' ), |
'add_new_item' => _x( 'Add New Music Review', 'music_review' ), |
'edit_item' => _x( 'Edit Music Review', 'music_review' ), |
'new_item' => _x( 'New Music Review', 'music_review' ), |
'view_item' => _x( 'View Music Review', 'music_review' ), |
'search_items' => _x( 'Search Music Reviews', 'music_review' ), |
'not_found' => _x( 'No music reviews found', 'music_review' ), |
'not_found_in_trash' => _x( 'No music reviews found in Trash', 'music_review' ), |
'parent_item_colon' => _x( 'Parent Music Review:', 'music_review' ), |
'menu_name' => _x( 'Music Reviews', 'music_review' ), |
'description' => 'Music reviews filterable by genre', |
'supports' => array( 'title', 'editor', 'author', 'thumbnail', 'trackbacks', 'custom-fields', 'comments', 'revisions', 'page-attributes' ), |
'taxonomies' => array( 'genres' ), |
'menu_icon' => 'dashicons-format-audio', |
'show_in_nav_menus' => true, |
'publicly_queryable' => true, |
'exclude_from_search' => false, |
'capability_type' => 'post' |
register_post_type( 'music_review', $args ); |
add_action( 'init', 'register_cpt_music_review' ); |
function genres_taxonomy() { |
add_action( 'init', 'genres_taxonomy'); |
The only line that changed was the
'taxonomies' => array('genre')
line within our custom post type. I added this line to tell our custom
post type to connect to our new taxonomy and use it instead of the
default category or tag structure WordPress comes installed with.
If you’ve made it this far you can now visit your WordPress admin
area and see your new custom post type and taxonomy(Genres) present.
Congrats!

Our
custom post type and taxonomy are successfully implemented. Here we can
add a new Music Review which contains various types of genres decided
upon by the user.
Getting Our Code To Output
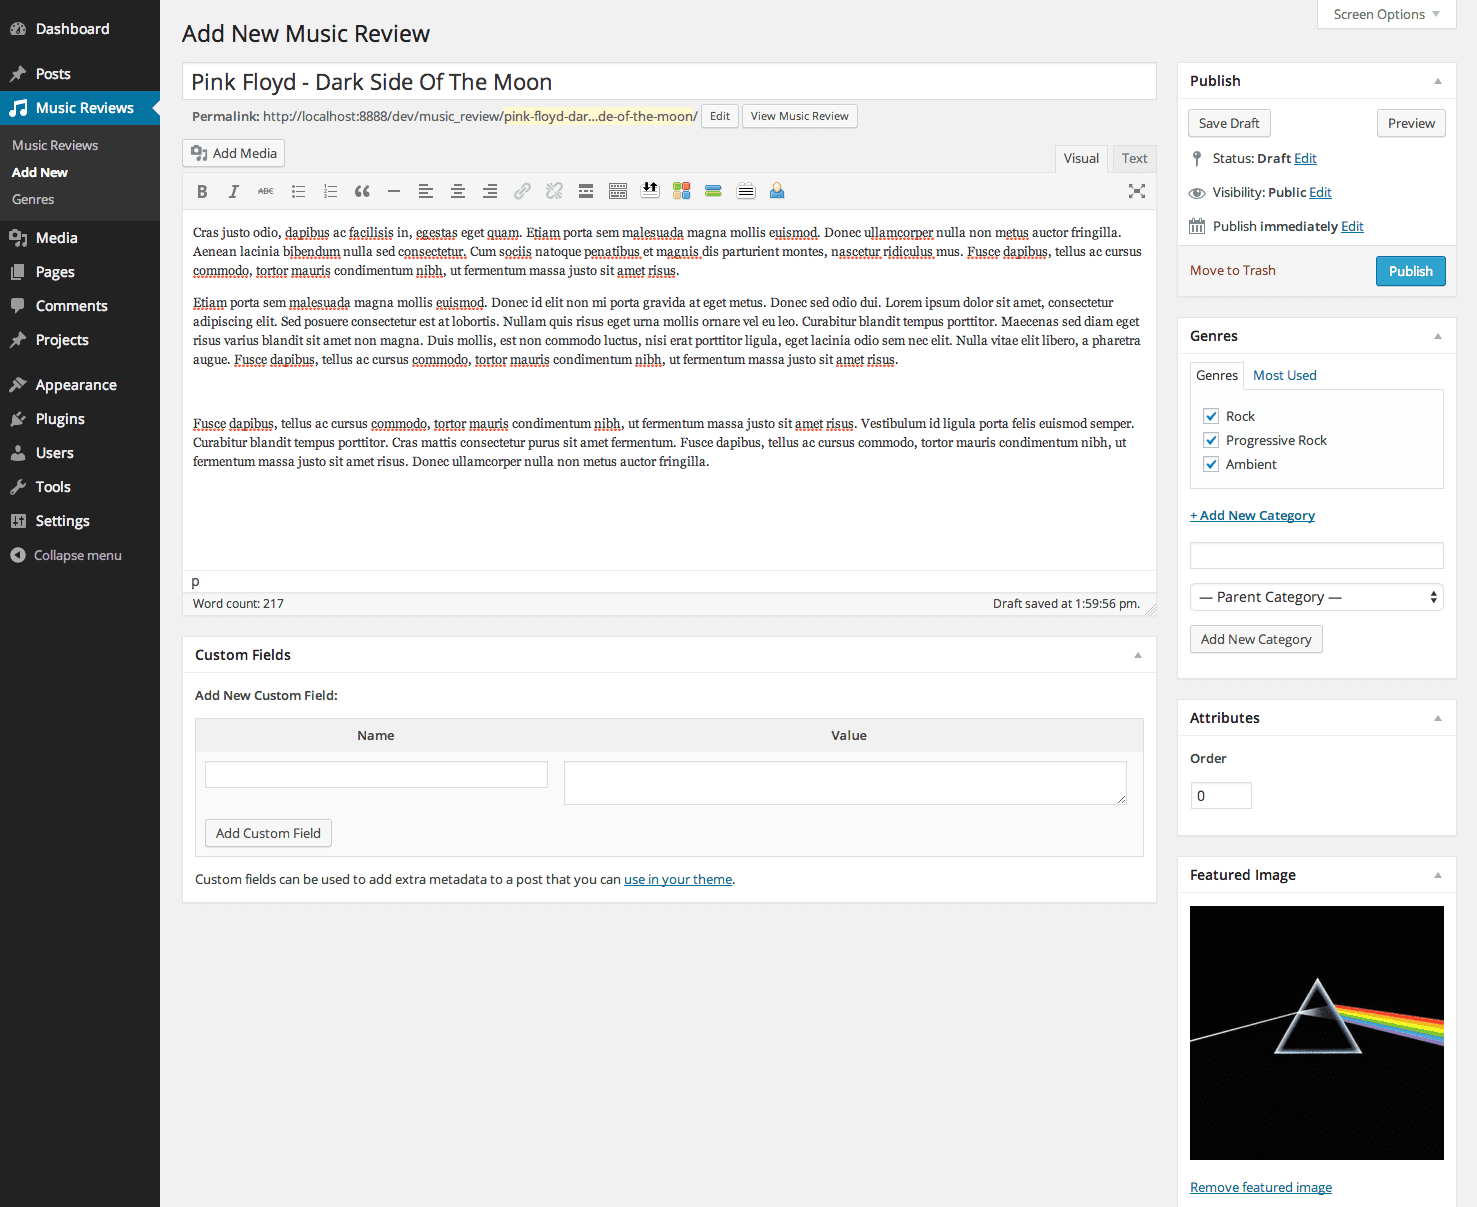
Below I’ll try adding a new music review. You should see the new
Genres section that we set up with our custom Taxonomy. With some data entered I’ll publish the post.
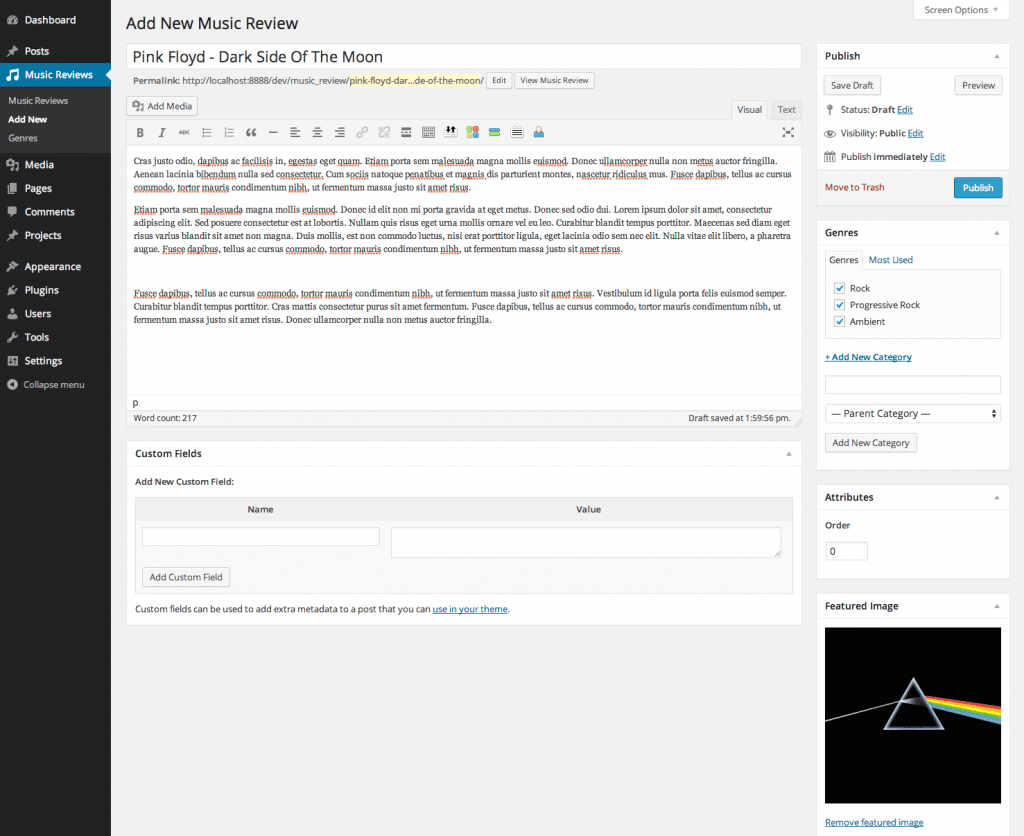
Create a new music review as an example.
At this point we have our functionality set up within our plugin.
In order to make things effortless we will rely on the plugin to create a new page called
Music Reviews.
The page will be referenced by our plugin and output any new music
reviews the user posts. We are doing this so the user doesn’t have to
edit a single line of code.
Tying it All Together
Our code now works but we should create a page that will use
function create_music_review_pages() |
'comment_status' => 'open', |
'ping_status' => 'closed' , |
'post_date' => date('Y-m-d H:i:s'), |
'post_name' => 'music_review', |
'post_status' => 'publish' , |
'post_title' => 'Music Reviews', |
$newvalue = wp_insert_post( $post, false ); |
update_option( 'mrpage', $newvalue ); |
And finally we need to create our
Music Reviews page once the plugin is activated. Adding the code below initiates the function we just wrote above (
function create_music_review_pages(){…}).
register_activation_hook( __FILE__, 'create_music_review_pages'); |
Testing
Our plugin should be ready to test at this point. Lets create an example music review and see what outputs.
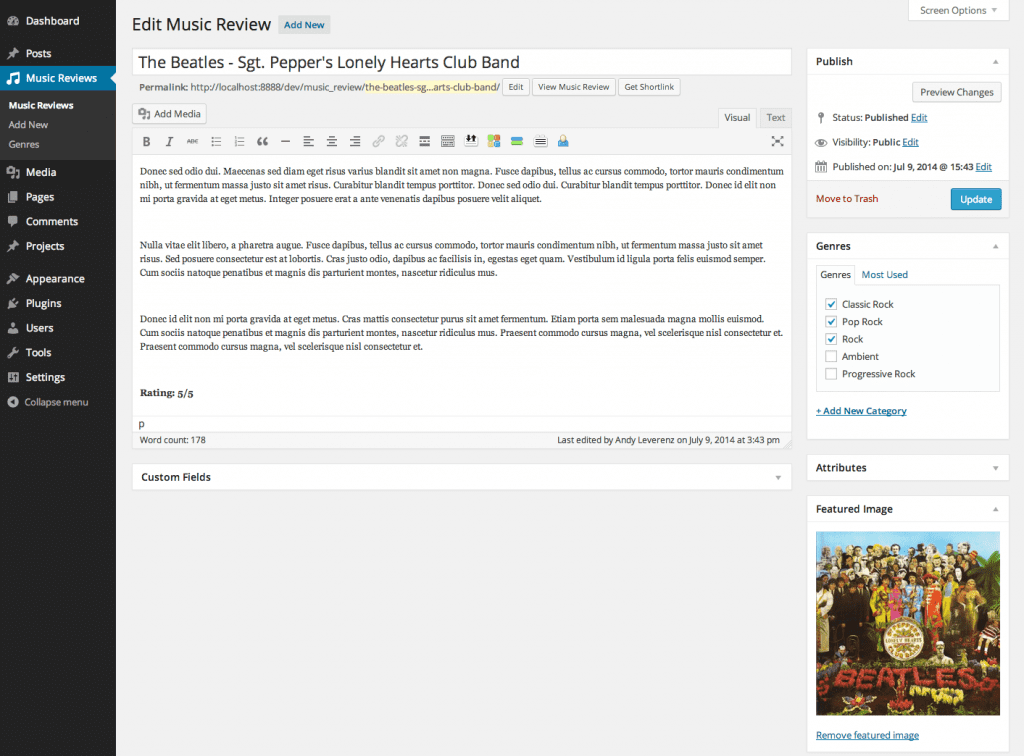
Create another music review to verify our plugin is working correctly.
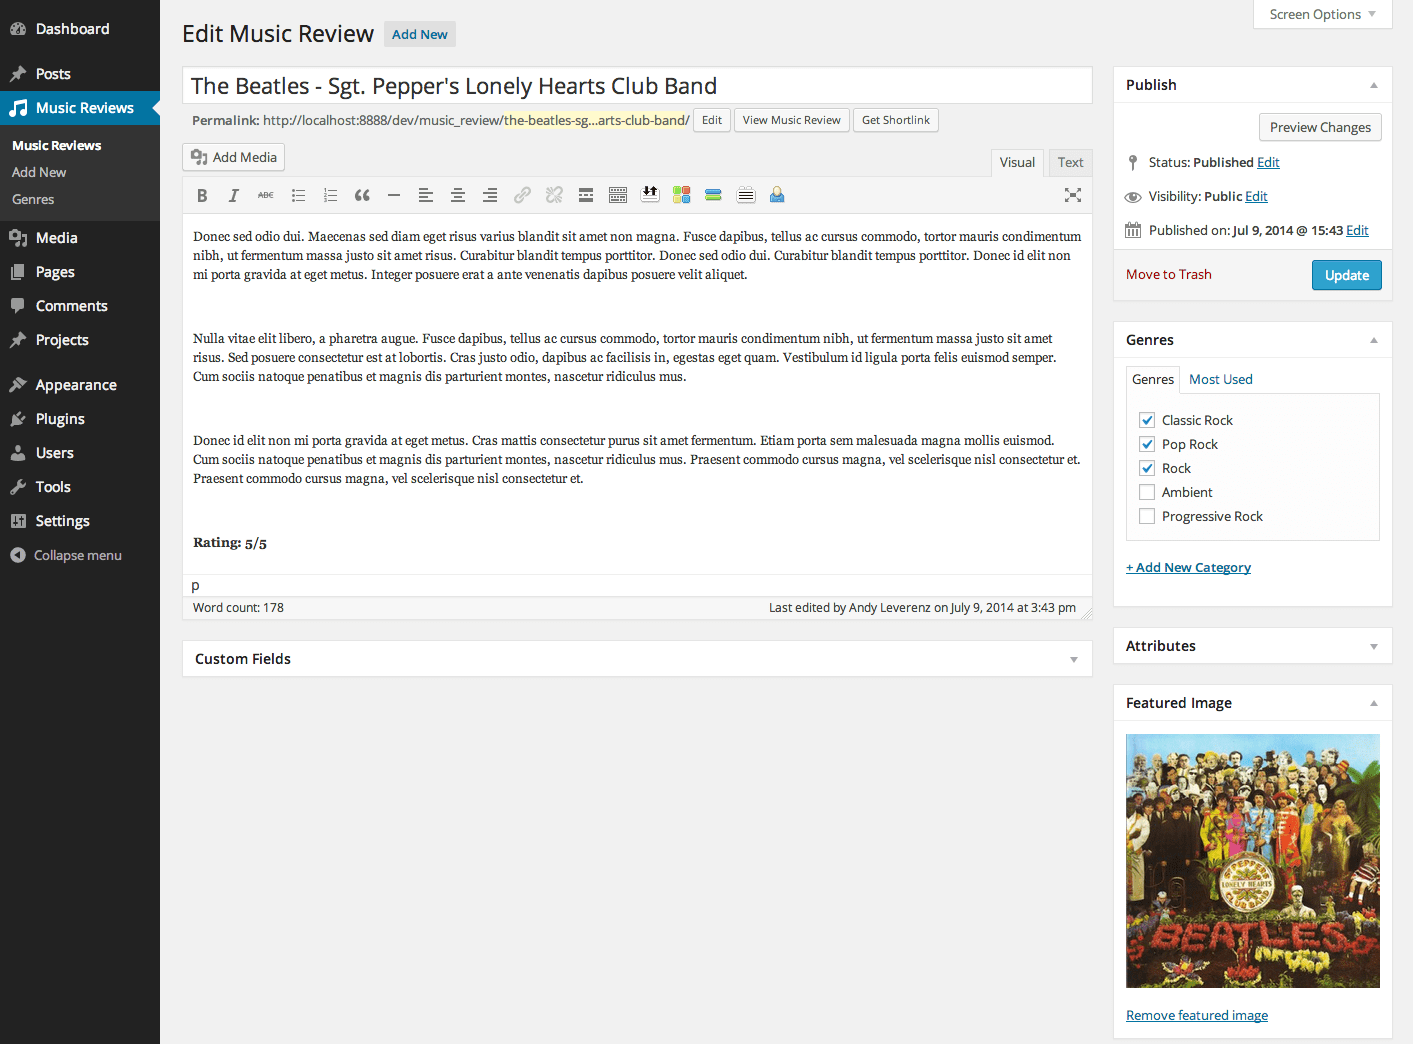
If you click
View Music Review once the post is
published you should be taken to a screen which looks similar to the
image below. Your theme and styles may vary…
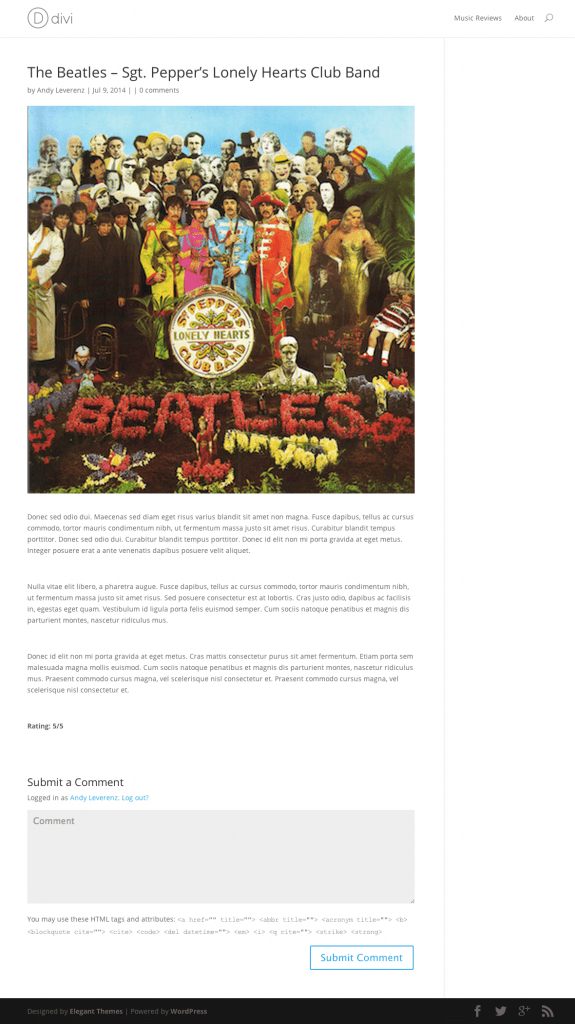
The single page music review template
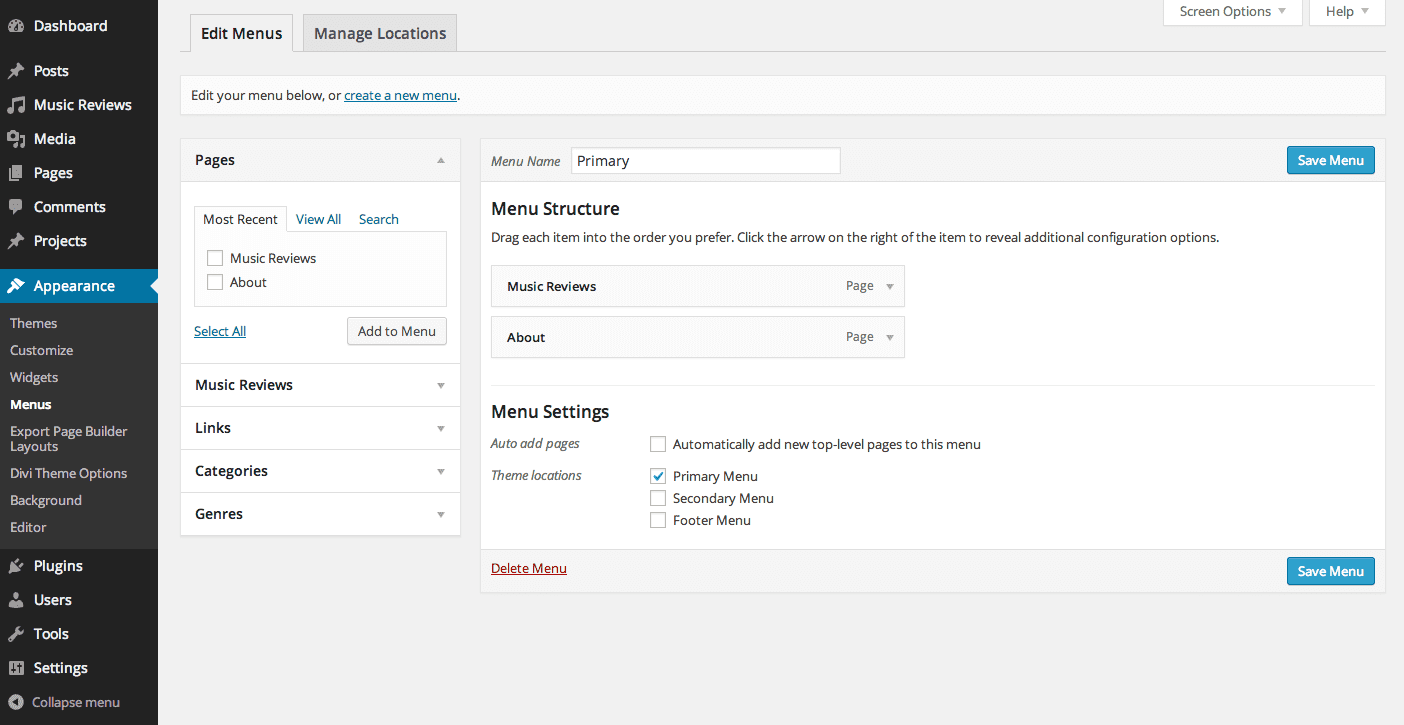
You may notice that I modified the menu to include our new
Music Reviews page. Doing this gives us easy access.

Adjusting primary navigation to include “Music Reviews” page
With your menu in place and saved click on
Music Reviews to see all the posts we have made so far.
Based on the page template supplied by your theme the Music Review
should output all together and be clickable through to the single review
template. You will probably notice that the music review I posted
earlier has output as well as the one we just created.
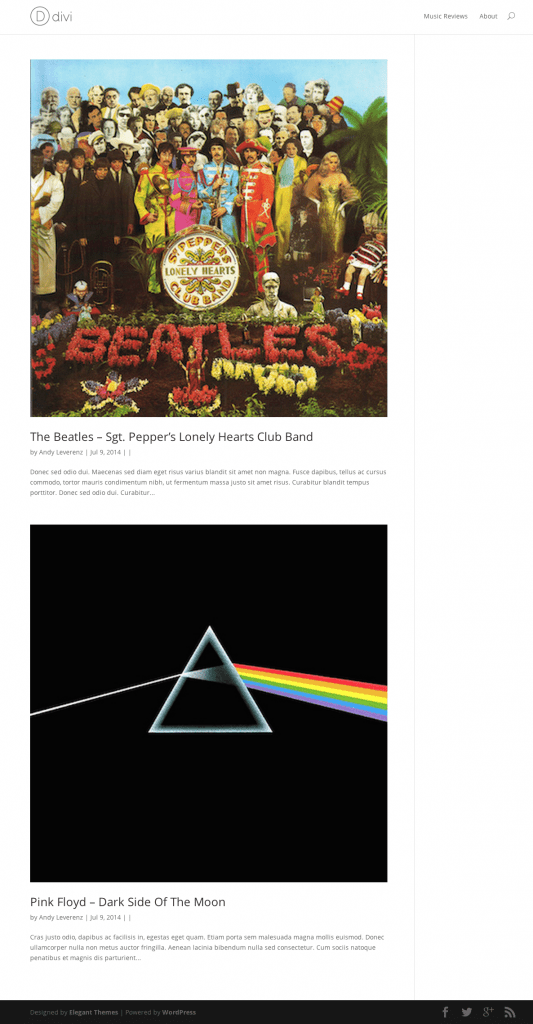
Our music reviews on the “Music Review” page
Our feature image, title, genre, and review all have posted successfully.
Our plugin works!
To verify, you can deactivate the plugin and reinstall it or activate it. Upon doing so a new Page called
Music Reviews
should be created. You can delete or reuse the one from before if there
are duplicates but there should be only one “Music Reviews” page. We
could have added a function to delete and restore this page within our
plugin but I wanted to keep things as simple as possible.
Finish
Our plugin is a relatively simple one. You can extend it so much
further by including it’s own predefined templates, custom widgets, more
taxonomies and so much more. Creating a plugin is no easy feat. You
will want to plan your plugin before even moving to development. Knowing
what you can an can’t do with WordPress before coding your own plugin
is a crucial step to developing a quality one. The plugin create in this
tutorial is meant to teach by example. There are better standards to
follow and more useful practices to endure. Be sure to read the
WordPress Codex and get familiar with the
WordPress Plugin API.
If a plugin isn’t out there and you need custom functionality for your
website then I stronger encourage trying to create your own!


No comments:
Post a Comment